Week 11: Input devices
Objectives
- Individual assignment : Measure something: Add a sensor to the microcontroller board that you have designed and read it
- Group Assignment: Probe an input device's analog levels and digital signals
Find the link to the group assignment here
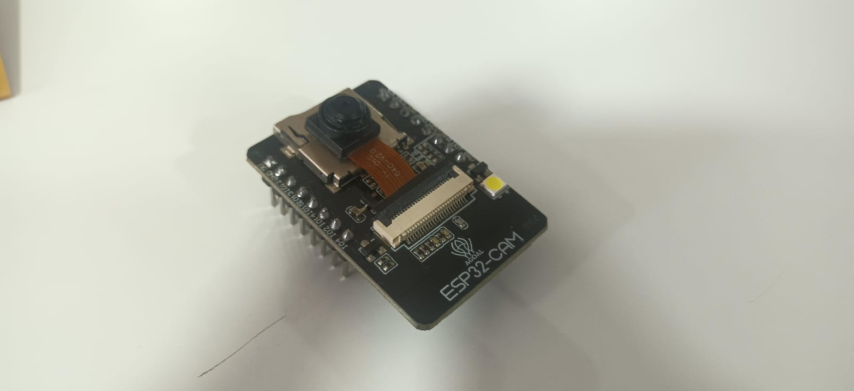
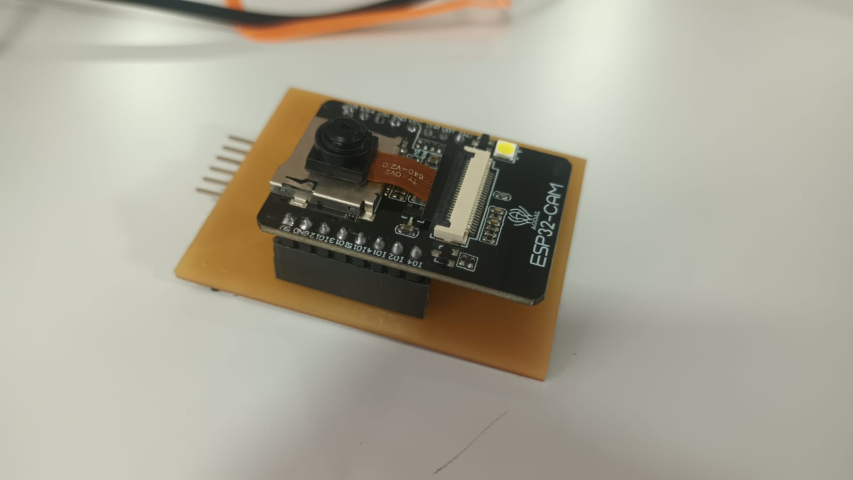
ESP32 cam
The input device I chose is ESP32 cam since I found it very interesting
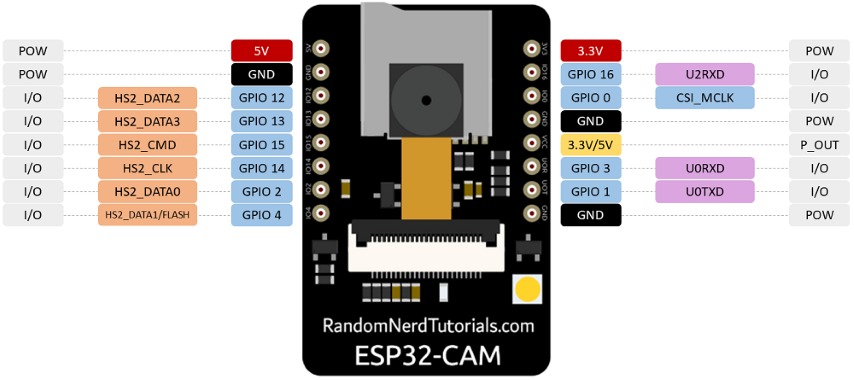
The ESP32-CAM is a versatile and powerful development board that combines the capabilities of the ESP32 microcontroller with a built-in camera. This makes it ideal for a wide range of IoT (Internet of Things) and image processing applications. Here are some key features of the ESP32-CAM:
Key Features
-
Microcontroller
:
- ESP32 Chip : Dual-core Tensilica LX6 microprocessor.
- Clock Speed : Up to 240 MHz.
- RAM : 520 KB SRAM.
- Flash Memory : 4 MB.
-
Camera
:
- Camera Module : OV2640.
- Resolution : 2 MP (1600 x 1200).
- Lens : Wide-angle, various options available.
- Image Output Formats : JPEG, BMP, and grayscale.
-
Wireless Connectivity
:
- Wi-Fi : 802.11 b/g/n.
- Bluetooth : Bluetooth 4.2 and BLE (Bluetooth Low Energy).
-
I/O Pins
:
- GPIOs : Several General Purpose Input/Output pins.
- UART : Universal Asynchronous Receiver-Transmitter.
- SPI : Serial Peripheral Interface.
- I2C : Inter-Integrated Circuit.
- PWM : Pulse Width Modulation.
- ADC : Analog-to-Digital Converter.
- DAC : Digital-to-Analog Converter.
-
Other Features
:
- MicroSD Card Slot : Supports up to 4 GB SD card for additional storage.
- Built-in Flash LED : Can be used as a flash or status indicator.
- Reset and Boot Buttons : For easy programming and reset.
- Low Power Consumption : Various power-saving modes available.
Additional Features
-
Size and Form Factor
:
- Compact Size : Small form factor suitable for embedded applications.
- Pin Headers : Male headers for easy prototyping and integration.
-
Power Supply
:
- Voltage Range : Typically 5V via micro USB or external power supply.
- Low Power Modes : Deep sleep and other power-saving features.
-
Programming and Development
:
- Arduino IDE Support : Can be programmed using the Arduino IDE.
- ESP-IDF : Official development framework provided by Espressif.
- MicroPython : Supports MicroPython for easy scripting.
- OTA Updates : Supports Over-The-Air firmware updates.
Applications
- Surveillance and Security : Remote monitoring and security cameras.
- IoT Projects : Smart home devices, environmental monitoring, etc.
- Image Processing : Object detection, face recognition, and more.
- Robotics : Vision-based navigation and control.
- DIY Projects : Hobbyist and maker projects involving image capture and processing.
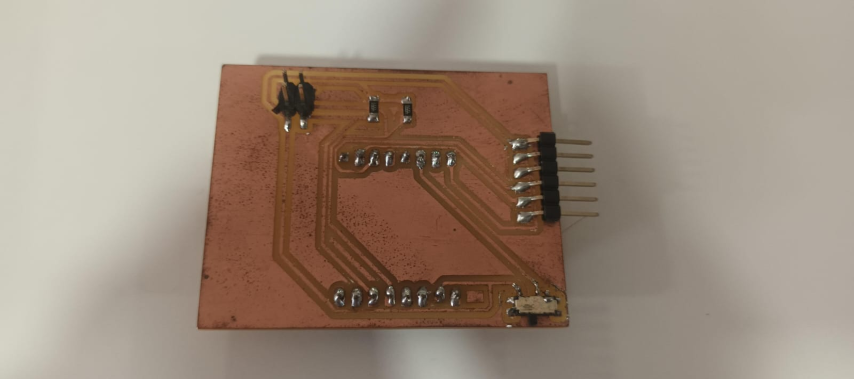
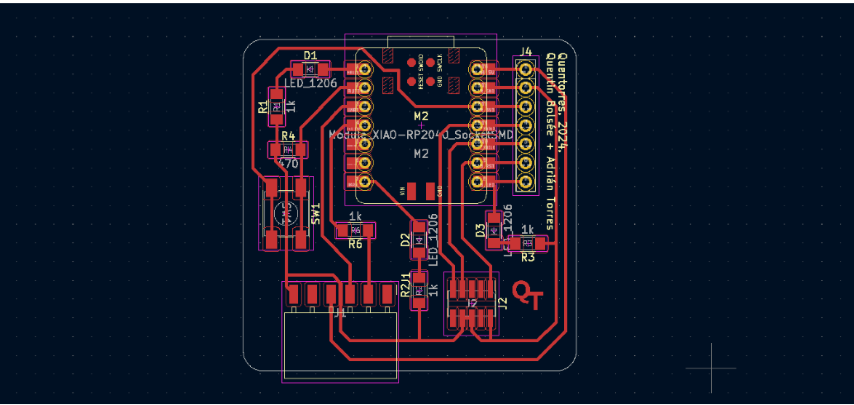
PCB design
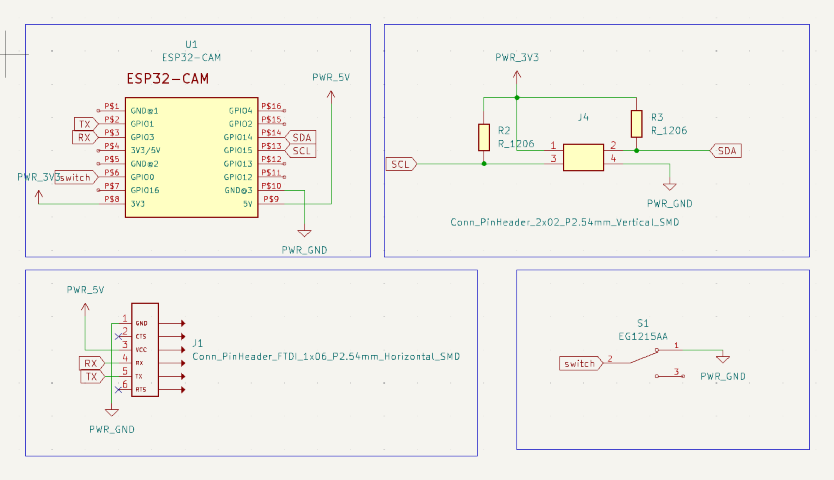
I designed a board for ESP32 Cam in Kcad. Here is the schematic diagram
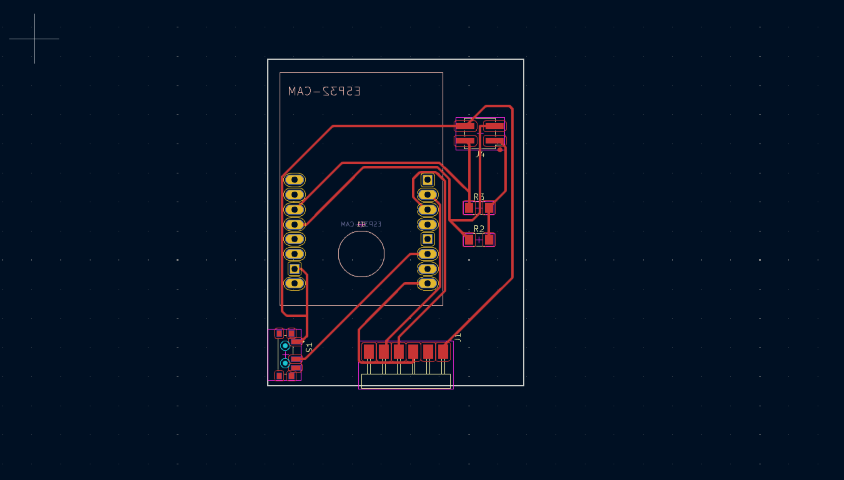
This is the PCB after milling and soldering components to it
Connections
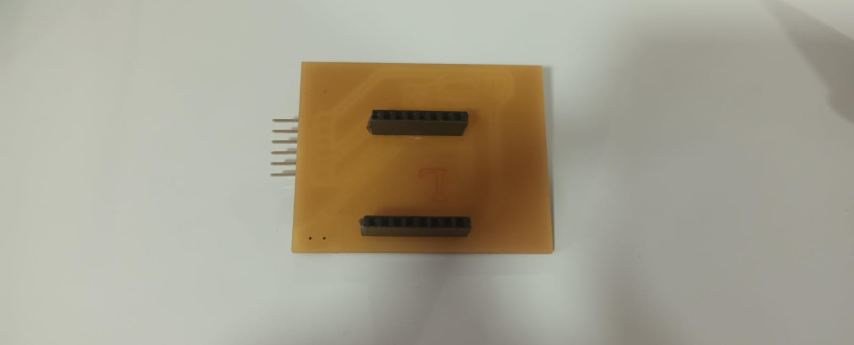
I was planning to to connect ESP32 board to quentorres board to use it as a serial connector.
Programming
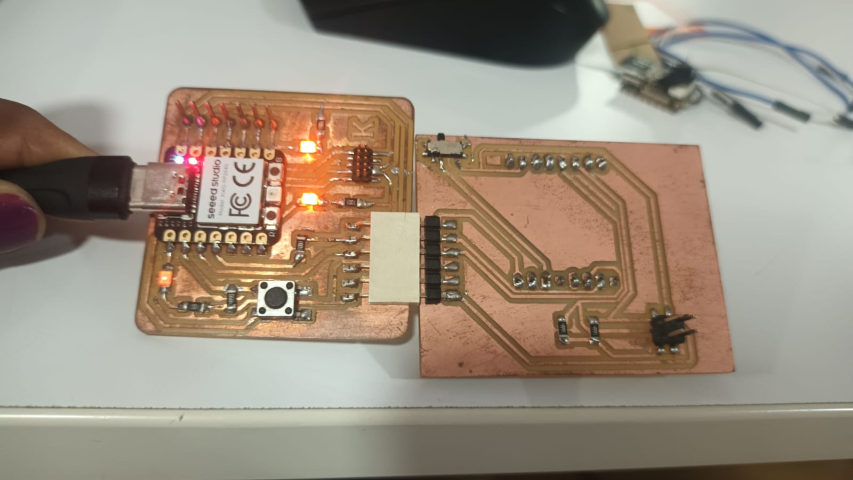
First I had to Convert quentorres board into a programmer.
I followed the tutorial in the quentorres page to use the board as a programmer
https://gitlab.fabcloud.org/pub/programmers/quentorres/-/blob/main/firmware/free_dap_rp2040.uf2
.png)
Once that was done I had to add a library for ESP32 to connect it to the webserver and capture/ record.
File>preferences
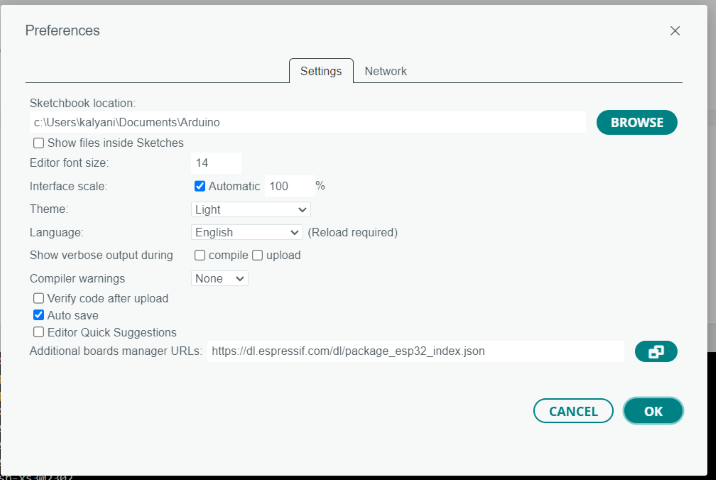
And then I had to go to the board manager and Install it
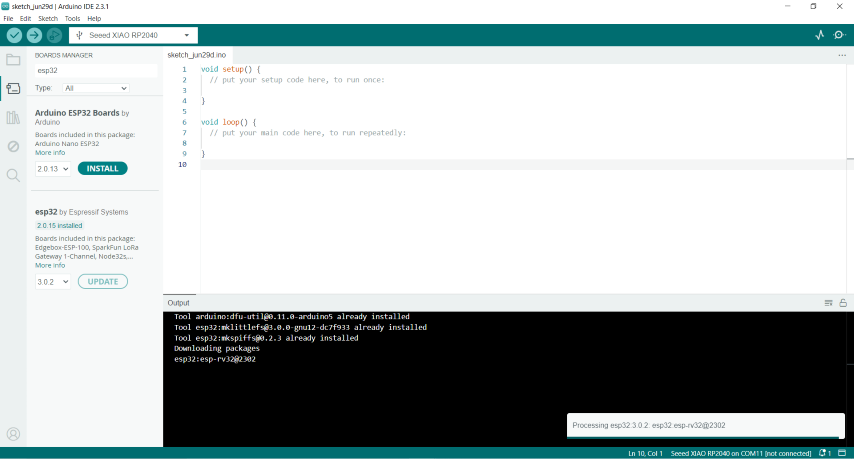
once the library was installed I chose the required board which is AI Thinker ESP32-CAM
.png)
And then I tried uploading an example code.
.png)
Initially I had trouble uploading the code because of a mistake in the PCB which broke my ESP32 CAM. I had given a wrong connection I was able to upload the code once I fixed and I had to use a different ESP32cam
Then I uploaded the program once gain and got the result
If the code is executed correctly, you should see the address on the Serial Monitor
We can copy the link and paste it in our search engine to access the webserver
.png)
It looks like this. There are different settings we can adjust.
.png)
There was a also a face recognition feature. But I could’t figure out to enroll the or register the recognized face
Face recognition
Then I decided to try out object recognitition using ESP32 cam
Object Recognition
Edge Impulse Studio
Setup the project
I was suggested to use Edge impulse to build a model for object recognition. I followed this tutorial religiously step by step for that. You can find the link to the tutorial here
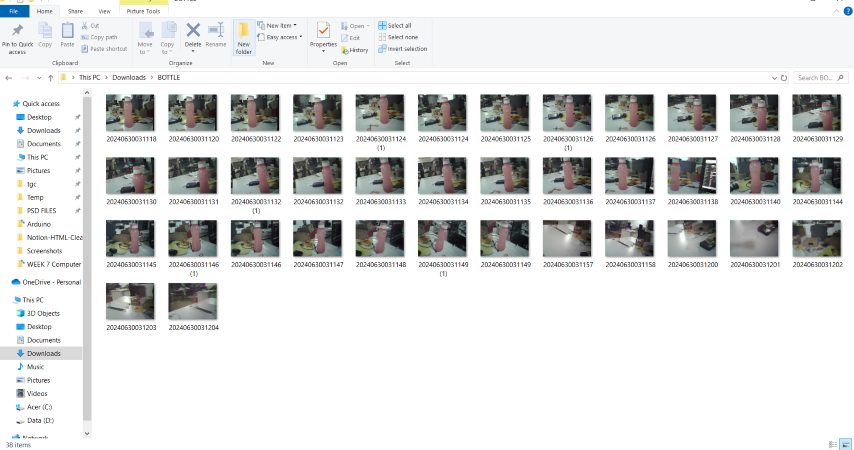
The object I chose to use was my bottle for no particular reason other than the fact that it was right next to my laptop
The first step is Data collection
We can use the webserver to collect multiple images of the object and store it in a folder
Uploading the unlabeled data
On Studio, go to the
Data acquisition
tab, and on the
UPLOAD DATA
section, upload files captured as a folder from your computer.

Uploaded the folder here
.png)
Labeling the Dataset
Now we identify the object in each image, try to get the frame as close to the bottle as possible and label it. Here I have labeled it as BOTTLE
.png)
We also do the same with pictures that doesn’t have the bottle
.png)
Now we have our dataset
.png)
The Impulse Design
In this phase, you should define how to:
-
Pre-processing
consists of resizing the individual images from
320 x 240to96 x 96and squashing them (squared form, without cropping). Afterward, the images are converted from RGB to Grayscale.
- Design a Model, in this case, "Object Detection."
I created an impulse using the data set
.png)
.png)
You have to choose grayscale and save parameters
.png)
Balancing the dataset and split Train/Test
. After labeling them, it is time to select some images and move them to the test dataset. You can do it using the
three-dot menu
after the image name. I selected six images, representing 13% of the total dataset.
Now we have to select a few images and select the option move to test set
.png)
The Studio moves automatically to the next section,
Generate features
, where all samples will be pre-processed, resulting in a dataset with individual 96x96x1 images or 9,216 features.
.png)
Model Design, Training, and Test
.png)
.png)
.png)
.png)
Test model with "Live Classification"
Once our model is trained, we can test it using the
Live Classification
tool. On the correspondent section, click on
Connect a development board
icon (a small MCU) and scan the QR code with your phone.
.png)
.png)
Once we haves tested and get results using the phone camera we can move onto dowloading and uploading the library to arduino
Open Arduino IDE and add library
.png)
You can see that the library has been downloaded in zip format
.png)
Now we can select the program the library
.png)
and finally I uploaded the code.
.png)
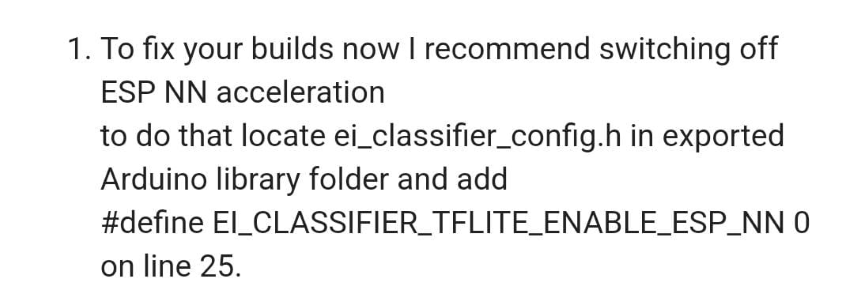
Initially the code was not working and then I modified the code to switch of the ESP NN acceleration. it made the compiling process very slow but it worked
.png)
Once I uploaded it I was able to identify the object
.png)
It was not really that efficient in identify the object at all angle but it did work. if we had more images in the dataset it will be more accurate.
Design Files
ESP32 PCB Design
.png)
.png)
Code to capture imagewebserver
Code for object recognitionRecognition